Choosing the Right Shelving Materials
Reclaimed Wood for Rustic Charm
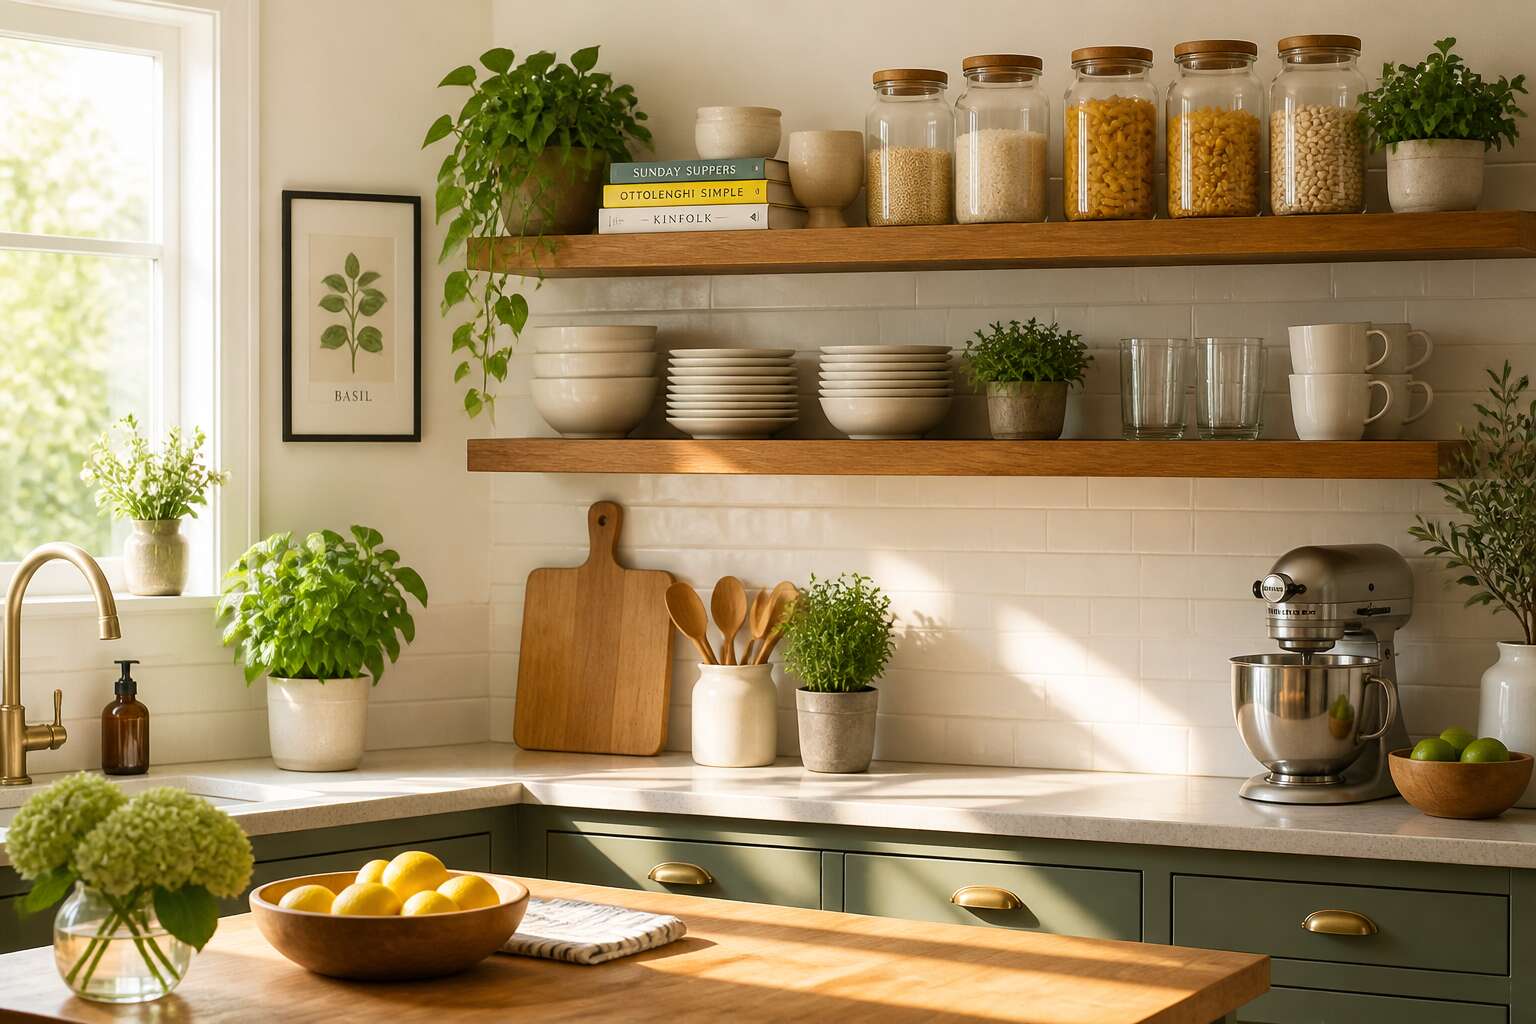
In a century-old farmhouse, the ceiling beams that sheltered generations now find new purpose as kitchen shelving storage. Reclaimed wood carries that history in its grain, a quality no factory finish can replicate. The patina, the nail holes, the slight warps, they all mark its history.
In my experience, selecting the right boards requires attention. Woods like oak and teak withstand humidity better than softer pine. Each piece should be inspected for hidden defects before installation. The cutting and sanding process will reveal the wood’s true character.
Common sources for reclaimed timber include:
- Demolished barns and warehouses
- Old wine casks from the Cape winelands
- Decommissioned railway sleepers
For rustic charm, the imperfections are the point. In kitchen shelving storage, a reclaimed shelf invites touch, reminding us that our kitchens hold more than meals. The result feels lived-in on day one, and it only deepens with time.
Stainless Steel for Commercial Appeal
Stainless steel offers a compelling alternative for kitchen shelving storage when warmth gives way to the need for unwavering practicality. In the bustling heart of a South African home, where the heat can be relentless and activity is constant, this material stands as a testament to resilience. Its non-porous surface refuses to harbour bacteria, making it the gold standard for hygiene. While wood carries the soul of the past, steel is firmly anchored in the present, promising decades of service without a single crack or warp under pressure.
The choice here is about performance under fire. Unlike timber, stainless steel does not flinch in the face of a steaming pot or a platter fresh from the braai. It shrugs off moisture, stains, and the occasional knock without losing its composure.
– Unmatched durability: It withstands heavy loads without bowing, ensuring your kitchen shelving storage remains as straight as the day it was installed.
– Effortless maintenance: A simple wipe with a damp cloth restores its gleam, eliminating the need for oils, polishes, or special treatments.
– Thermal resistance: It handles heat and cold with equal indifference, protecting your walls from the steam of a simmering stew.
– Recyclable nature: For the eco-conscious, steel is infinitely recyclable, reducing its footprint on our precious landscape.
For a modern kitchen designed for serious cooking, this approach transforms shelving into a workhorse that never complains. It provides a sleek, professional aesthetic that pairs beautifully with exposed brick or contemporary cabinetry. While the rustic charm of wood speaks to the heart, the quiet efficiency of stainless steel speaks to the mind, offering a clean slate for culinary creativity. The right material here is not about volume, but about wise investment in kitchen shelving storage that will outlast every trend and every season.
Open Glass Shelving for Visual Lightness
Floor-to-ceiling cabinetry can make a modest kitchen feel smaller. Open glass shelving lets light pass through instead of bouncing off solid fronts. Wood provides warmth, steel provides strength, and glass provides visual lightness. The eye settles on what sits upon the shelf, so your tableware becomes the design. For a small South African kitchen, this shift is immediate.
The practical side holds its own. Tempered glass resists shattering under everyday use, and the transparent surface keeps kitchen shelving storage honest. Dust shows, but so does the good stuff!
The design hinges on two details:
- The frame determines the effect, so choose slim metal tracks that recede into the wall.
- Glass pairs well with under-shelf lighting, producing a glow that solid timber absorbs.
In my own projects, glass offers kitchen shelving storage without visual bulk, and it opens up a narrow galley kitchen faster than any paint colour.
Wire and Metal Options for Durability
Moisture and heat defeat lesser materials. For kitchen shelving storage that endures, wire and metal options stand firm. Powder coated steel resists rust while chrome handles humidity. Wire shelving allows air to circulate, keeping stored items dry. Its open structure also shows spills before they become stains.
A heavy cast iron pan finds a permanent home on a welded steel shelf. Aluminium offers lightweight strength, though it dents under careless, heavy loads. Choose stainless steel when you require both. These surfaces wipe clean with a damp cloth.
Wire shelving suits pantries and laundry areas. Metal units serve sculleries. Both support consistent function in South African homes, where coastal air and load shedding heat test all materials.
Space-Saving Arrangements for Compact Kitchens
Vertical Storage Near Ceiling Height
In a compact kitchen, the zone between your highest shelf and the ceiling is not wasted volume. Cape Town apartments and Johannesburg studios often have generous ceiling heights, yet most homeowners leave this upper-vertical plane untouched when mapping out kitchen shelving storage.
Suspended racks, lofted cabinets, and ceiling-mounted pulley systems exploit every centimetre. A tall, narrow ladder unit extends upward without increasing the floor footprint. Floating ledges near the ceiling hold platters used twice a year, freeing lower shelves for daily items.
When planning this arrangement:
- Pull-down mechanisms for heavy pots
- Locking steps or small ladders for regular access
- Reinforced brackets anchored into masonry walls
In my experience, this vertical system rearranges priorities, keeping bulky items reachable while preserving floor space.
Corner Shelving for Awkward Dead Zones
The average kitchen surrenders nearly a third of its cabinet volume to the corner void. In South African homes, that silent space could hold your entire bakeware collection. The right kitchen shelving storage transforms this awkward dead zone into a functional workhorse.
Rotating carousels and swing-out trays deliver solid results, but they demand precise installation. Older Johannesburg flats often feature corners that deviate from true 90 degrees, so custom-cut wedges outperform off-the-shelf units. A lazy Susan with heavy-duty bearings handles cast iron without strain.
- Diamond shelves for unobstructed corner access
- Pull-out baskets on full-extension slides
- Half-moon turntables for shallow upper cabinets
The diagonal opening determines which system fits best. A properly planned corner arrangement adds several square metres of effective storage, altering how a compact kitchen functions on a daily basis.
Over-the-Door Spice Racks for Instant Access
In a compact Johannesburg apartment, the back of a cabinet door remains the most undervalued real estate. Over-the-door spice racks turn that vertical sliver into instant access for daily cooking. A narrow rack holding twelve jars frees an entire drawer for utensils. This kitchen shelving storage approach works because it uses space that would otherwise sit empty.
Consider the weight limits before installation. A door hinge designed for lightweight panels will sag under a fully loaded rack. Choose slim profiles that clear the shelf below. Some racks use adhesive strips, while others require screws. The screw-mounted versions handle heavier jars without compromise. I have seen adhesive strips fail within three months of Durban humidity.
- Clear acrylic racks for visible labels
- Wire racks with adjustable dividers
- Wooden racks for warmer interiors
Measure the door depth and frame width first. A rack that blocks the cabinet seal will cause moisture issues. The best kitchen shelving storage for this zone keeps the door functional and the spices within reach.
Narrow Pull-Out Pantry Shelves
Beneath a compact kitchen’s silent gaps lies the most underused storage of all. A 150 millimetre void between the fridge and the wall, once home to dust and lost coasters, can become a sliding larder. Narrow pull-out pantry shelves run on full extension runners, turning that sliver into deep, accessible layers.
Installation demands precision. Measure the gap at three points, because cabinet frames often bow. Check the floor slope before ordering; a unit that tilts two degrees will scrape against its neighbour. This kitchen shelving storage works best when the runner rating matches the load, so pick slides rated for at least 30 kilograms.
- Tall compartments for oil bottles
- Shallow trays for spice packets
- Vented sections for potatoes
In Johannesburg housing stock, these gaps vary wildly. A custom-built unit costs less than a new cabinet and reclaims space that never existed before. For this style of kitchen shelving storage, the void becomes the strongest asset. Even the quietest gap has a voice, and it asks for order.
Under-Cabinet Hanging Racks for Quick Reach
Under-cabinet hanging racks solve a persistent problem: the thirty centimeters between countertop and cabinet. Here, in South African kitchens where counter space is often a premium, this vertical band remains untouched. A rail system mounted beneath wall units transforms this area into immediate access for daily tools. Instead of digging through drawers for a garlic press or peeler, you simply reach forward and grab.
This arrangement excels for frequently used utensils. The placement requires no bending and no stretching. For compact kitchens, this immediate access reduces preparation time and keeps the workspace clear. Consider what belongs here:
– Spatulas and wooden spoons for everyday cooking
– Measuring cups and spoons for baking
– Tongs and whisks for quick tasks
– Dish brushes and cloths for cleaning while cooking
Sturdiness matters, as utility outweighs aesthetics in this zone. Stainless steel rails with sliding hooks hold heavier items without sagging. The installation effort is minor, using existing cabinet framing with simple screws or adhesive mounts, whichever suits your wall structure. This system adds storage without consuming any horizontal surface area, making it a particular asset in apartments or compact townhouses.
The visual effect remains minimal, as hanging tools do not obstruct the workspace beneath. Light passes through gaps between utensils, maintaining an open feel. For homeowners who prefer not to drill into tiled backsplashes, tension-based caddies offer a temporary alternative that still delivers quick access, though they cannot support the same weight. This small addition yields practical daily returns for a modest investment.
Organizing Kitchen Shelves by Category
Pantry Staples and Dry Goods Rotation
South African kitchens face humidity challenges. Coastal moisture can turn a bag of maize meal into a weevil infestation within three weeks. The right kitchen shelving storage accounts for these conditions from the start.
Grouping pantry staples by category makes inspection simpler. I give one shelf to flours and grains, another to sugars and legumes. Older containers sit forward, fresh purchases line up behind them. This keeps dry goods rotating in purchase order.
An effective shelf layout might include:
- Airtight glass jars for maize meal, rice, and oats
- Stackable tins for samp, sugar, and lentils
- Smaller sealed pots for seeds and herbs
The kitchen shelving storage reflects your household’s cooking patterns. Breakfast items occupy the shelf nearest the kettle. Baking supplies cluster beside the mixing corner. Order emerges without constant effort.
Cookware and Bakeware Display
Ten cast iron pots stacked on a high shelf strain both the arm and the shelf. The right kitchen shelving storage places cookware where you can reach without a step stool. I split my shelving into zones: frying pans next to the stove, slow cookers on the bottom, bakeware lined up like files. That simple division prevents frantic searches and protects enamel from chipping.
Grouping keeps everything visible:
- Everyday pans and lids on open hooks
- Baking trays and cooling racks vertical to save depth
- Rarely used casserole dishes on the highest shelf
Bakeware display works best when you see each tin’s rim. A sturdy wire rack arranges muffin pans and loaf tins side by side. This turns a jumbled cupboard into a working station. It changes how freely I bake!
Everyday Dishware and Glassware Clustering
Your morning cup and the plate you eat off define the pace of the day. The right kitchen shelving storage treats these everyday items as a working set, not as a landfill. In a South African household, where rooibos glasses and melamine dishes overlap, you need separation by height and reach.
Group your glassware in rows that one hand can service:
- Keep tumblers and mugs on the bottom shelf, already turned the same way.
- Stack normal plates directly above the dishdrawer, not behind the oven trays.
- Reserve the upper shelf for the delicate wine coupe we all bought but use sparingly.
This way you stop groping for a clean glass when the coffee is ready. It also stops the chipped clamor and the slight feeling of panic every time you open the door.
Balancing Accessibility with Aesthetics
Everyday Essentials at Arm’s Reach
You know the feeling. That quiet tension between a kitchen that looks pristine for the camera and one that actually functions for your daily life. We chase the magazine aesthetic, but we live with dirty mugs and the morning rush. The secret to resolving this conflict lies in finding the equilibrium where visual calm meets practical chaos. It is the art of making sure your kitchen shelving storage works for you, not just for the photos.
The trick is to allocate space based on frequency of use. The items that see the light of day every morning deserve a prime spot on the open shelves. That’s your coffee canister, your favourite mug, the bottle of olive oil that finishes every meal. If it is a daily tool, it earns the right to be seen. If you only use the electric mixer twice a year, it belongs behind closed doors. Give the everyday heroes a home where they are ready to be grabbed, and you eliminate the frustration of digging through cupboards while the coffee goes cold.
When you consider placing these daily staples on display, think about the visual grouping. A shelf full of mismatched plastic containers creates noise. A shelf with three identical glass jars holding sugar, flour, and pasta creates a rhythm. This is where you can achieve that balance between accessibility and aesthetics. Put the essentials in uniform vessels. Opt for a tiered spice rack to see your go-to flavours instantly. Store your cutting boards vertically in a simple wooden holder.
– Keep cookware lids on a wall rack to free up drawer space.
– Use a clear canister for your most-used baking ingredients.
– Place a small tray on the counter to corral oils and salts.
The goal is to make the act of cooking and cleaning seamless. You want to extend your reach without stretching your patience. When the design is intuitive, the kitchen becomes a space of ease rather than a source of daily friction. It is a quiet, deliberate system that supports your routines. This thoughtful placement turns your kitchen shelving storage into a liveable, breathable part of your home, rather than a static display. You simply design for life first, and the beauty follows.
Incorporating Greenery and Decor Pieces
The Art and Science of Kitchen Shelving Storage
Let’s be honest: the kitchen is a grey area. It is where your curated Pinterest board goes to die, suffocated by the smell of burnt toast and the sight of a blender you swore you would use daily. The struggle is real, but the solution often lies in how you treat your vertical real estate.
We all know the drill. You install gorgeous open shelving, ready for a magazine spread. Then reality hits. Within a week, the shelves are a chaotic jumble of mismatched mugs and a dusty spice rack that feels like a relic from a 1990s sitcom. The issue isn’t your organization skills; it is the lack of a strategic framework.
To master kitchen shelving storage, you must embrace the concept of “zoning.” Think of your shelves not as catch-alls, but as distinct departments. Reserve the eye-level sections for the items you grab during a caffeine-deprived haze. These are your daily drivers: the coffee beans, the favorite pan, the mug that fits your hands perfectly. Higher up, you can store the serving platters and the glassware reserved for guests you actually like. Lower down, keep the heavy cast iron and the kids’ plastic bowls. The goal is visual weight at the bottom and lightness at the top.
But here is where the subtle sabotage occurs: the “in-between” items. The things you rarely use but aren’t quite garbage. For these, look for hidden heroes. A tiered riser inside a cabinet doubles your capacity for canned goods. A magnetic strip on the backsplash frees up drawer space for your knives and metal utensils. And do not underestimate the power of a simple tension rod under the sink; it transforms that abyss into a functional space for spray bottles.
Here are three unsung heroes of kitchen shelving storage that offer maximum return on investment:
– Stackable wire racks: These turn one shelf into two, perfect for storing plates or mixing bowls.
– Clear acrylic bins: Grouping like items (e.g., baking supplies, snacks) makes it easier to see what you have, preventing you from buying a third bag of flour.
– Lazy Susans: Placed in corner cabinets, they eliminate the black hole where Tupperware lids go to die.
Of course, we cannot ignore the decorative aspect. But keep it minimal. Instead of cluttering the shelves with “live, laugh, love” signs, opt for a single, large ceramic vase or a stack of vintage cookbooks. These accents break up the monotony of the dishes without adding cognitive load.
Ultimately, the best setup is one that anticipates your mess. You can have a beautiful kitchen without turning it into a museum. It just requires a blend of clever products and a ruthless purge of the items that don’t deserve the prime real estate. When you find that rhythm, your mornings become a flow rather than a treasure hunt. The dust will still collect, but at least you will know exactly where to find the pepper.
Baskets and Bins for Visual Consistency
The eternal tug-of-war between a shelf that looks like a still life and one that works like a machine ends the moment you introduce baskets. This is where kitchen shelving storage transforms from a passive display into an active tool. The secret lies not in what you put on the wood, but in how you contain it. A jumble of mismatched Tupperware instantly reads as chaos; the same items tucked into a textured seagrass bin suddenly look intentional.
The strategy is simple: buy food staples in bulk and hide the ugly packaging. Place a dedicated basket for everyday vitamins or morning tea bags right next to the coffee station. This allows you to grab what you need without disturbing the curated arrangement next to it. The visual rhythm of the shelf remains intact because the basket acts as a buffer between your messy reality and your design aspirations.
When selecting vessels, consider the material as part of your decor scheme. Open wire baskets offer visibility for items you reach for constantly, while closed-front bins offer a reprieve for plastic wrap, foil, and reusable bags. For a cohesive look that handles the humidity of the South African climate, skip the cardboard and opt for durable materials like galvanized steel or solid acacia wood. They handle the heat of summer and the damp of winter without losing their shape.
To bring this system together without overthinking it, follow this quick process:
1. Remove every item from the shelf and group them by utility.
2. Measure the depth and height of the shelf to ensure the bins will fit flush.
3. Assign the heaviest or most frequently used items to the open baskets.
4. Reserve the covered bins for items used once a week, like baking supplies or large serving spoons.
The magic happens when you step back and see the finished product. The clutter has vanished, replaced by a series of neat, geometric blocks. Your kitchen shelving storage now does double duty: it holds your tools and elevates the room’s style. It becomes a gallery of your daily habits, where the patina of a well-used canister and the weave of a good basket tell the story of a home that functions beautifully, without a single stressful glance toward the countertop.
Adjustable Shelving for Evolving Needs
The most successful kitchen shelving storage strikes a quiet balance between what you see and what you reach for. A shelf that looks pristine but forces you to dig behind a row of canisters for your daily coffee filters is a failure of function. Conversely, a shelf that holds everything at the front, all loose and accessible, creates visual noise that wears on the nerves. The goal is to make the objects you use every hour the stars of the show, while the weekly-use items retreat into the wings.
This is where adjustable shelving becomes the unsung hero of kitchen shelving storage. Your needs shift with the seasons, your cookware collection, and the arrival of a new coffee machine. Fixed shelves demand you adapt to them; adjustable systems adapt to you. When you can move a shelf up by three centimeters to accommodate a tall mixer, or drop it down to stack a row of glass jars, you regain control over both the layout and the look.
Consider how the shelf height affects your relationship to the items. A simple evaluation helps:
1. Identify the items you reach for blindly, like mugs or dinner plates.
2. Place these on a shelf that aligns with your natural reach, between chest and hip height.
3. Relegate bulky appliances to lower or higher positions, where their mass won’t interrupt the sightline.
4. Adjust the spacing so that each item has a few centimeters of breathing room, which prevents the shelf from looking packed and chaotic.
The beauty of this approach is that it treats kitchen shelving storage as a living system, not a fixed installation. When your baking hobby peaks, you lower a shelf to fit flour canisters and a stand mixer. When you switch to a minimalist diet, you raise the shelf and add ceramic storage jars. The flexibility encourages you to edit your space regularly, which keeps the kitchen honest and current with how you actually live. That is the real payoff: a storage solution that bends to your routine, so the aesthetic never sacrifices usability.
Under-Shelf Lighting to Highlight Displays
We judge a kitchen by what it reveals, yet the deciding factor is often what the light chooses to expose. Under-shelf lighting turns kitchen shelving storage into a performance: the objects you need most become the brightest points, while rarely used items recede into softer shadow. The balance between accessibility and aesthetics hinges on this deliberate contrast.
Mount slim LED strips toward the front edge of each shelf, angled slightly downward. This placement illuminates labels and handles, not just the shelf surface. It invites your hand to the exact item without sweeping the whole shelf into harsh glare.
- Use warm light for earthenware and ceramics, cool light for glass and metal.
- Install dimmers so morning coffee prep feels different from evening entertaining.
- Hide the wiring inside shelf brackets or chase channels, keeping the clean line intact.
When light falls softly on the display, you stop hunting and start reaching. The shelf becomes a quiet guide, and your kitchen shelving storage finally works with your eyes, not against them.
Installation and Safety Considerations
Securing Shelves to Wall Studs
Most people assume a robust bracket is enough. The real question is what sits behind the plasterboard. Securing brackets to wall studs turns kitchen shelving storage from a hazard into a dependable feature. A stud finder is not optional; it is what separates a shelf that holds your grandmother’s stoneware from one that crashes at midnight.
Mark the stud clearly before drilling. Pre-drill a pilot hole to prevent splitting the timber. I always use hardened screws rated for shear strength, and repeat the process for every bracket along the run.
- Locate the stud with an electronic finder.
- Mark the centre point.
- Pre-drill.
- Drive the screw flush.
The wall carries the load, the stud carries the wall, and your shelving carries on without drama.
Calculating Load Capacity and Weight Distribution
Once the brackets are anchored, the next calculation involves what the shelf will actually carry. A 300mm deep shelf holding cast iron cookware behaves differently from one displaying spice jars. The load capacity depends on the bracket spacing, the shelf thickness, and the material itself.
Distribute weight evenly across the run. Concentrating heavy pots at one end creates torque that pulls the fixings forward. For kitchen shelving storage, spread heavier items toward the brackets and keep lighter goods between them. Consider the following when planning your layout:
- Check the manufacturer’s rated load per bracket.
- Factor in the weight of the shelf board itself.
- Allow a safety margin of at least 20 percent.
If the shelf deflects under your hand, it will fail under daily use.
Childproofing and Anti-Tip Brackets
In the quest for a beautiful and functional home, the kitchen remains the heart of the action. Yet, a cluttered countertop can quickly dim that warm glow, turning your culinary workspace into a chaotic mess. The solution often lies upward, in the form of open shelving that offers both display and utility. However, the true artistry of kitchen shelving storage is not just in what you put on the boards, but in how you secure them to the wall. A floating shelf that looks fantastic but wobbles under pressure is a recipe for disaster, both for your dishware and your peace of mind. The installation process is where good intentions meet the unforgiving laws of physics, and this is where attention to detail separates a stunning feature from a structural hazard.
Securing your shelving begins with a firm understanding of your wall’s anatomy. While locating a stud is the gold standard, many of us are faced with plaster or drywall that lacks a convenient wooden anchor point. In these situations, the quality of your wall plugs and the precision of your drilling determine the shelf’s fate. A drill bit that is too large creates a loose socket for the anchor, while one that is too small risks cracking the plaster. It is a meticulous process that rewards patience. When you finally drive the final screw flush against the bracket, the metal should feel solid, immovable, and ready to take the weight of your stoneware without complaint.
Once the brackets are secured, the conversation shifts to childproofing and daily resilience. In a busy household, shelves are not just static displays; they are subject to tugs, bumps, and the occasional flying toy. The anti-tip measures you take are the quiet guardians of your family’s safety. A shelf that is merely rested on its brackets can be nudged forward by a curious toddler reaching for a shiny pot lid. To combat this, consider furniture safety straps or L-brackets that secure the shelf board itself to the wall. This simple step ensures that the entire unit acts as a single, cohesive structure rather than a loose plank waiting for an accident. It is a small aesthetic compromise for an immense gain in domestic security.
Furthermore, the materials you choose play a significant role in the stability of the unit. A thick, solid wood board has a natural heft that resists movement, whereas a lightweight composite may vibrate or shift more easily. When installing multiple shelves, always check the level with a spirit level before tightening the final screws. A shelf that slopes down by even a few millimeters will encourage items to slide forward over time, increasing the risk of them being knocked off the edge. Eventually, the rhythm of your kitchen shelving storage becomes a silent ballet of balance and restraint. By embracing robust installation methods and proactive safety measures, you ensure that your lovely displays remain a source of pride, not anxiety. This is how we build beauty that lasts, one secure screw and sturdy bracket at a time.



0 Comments