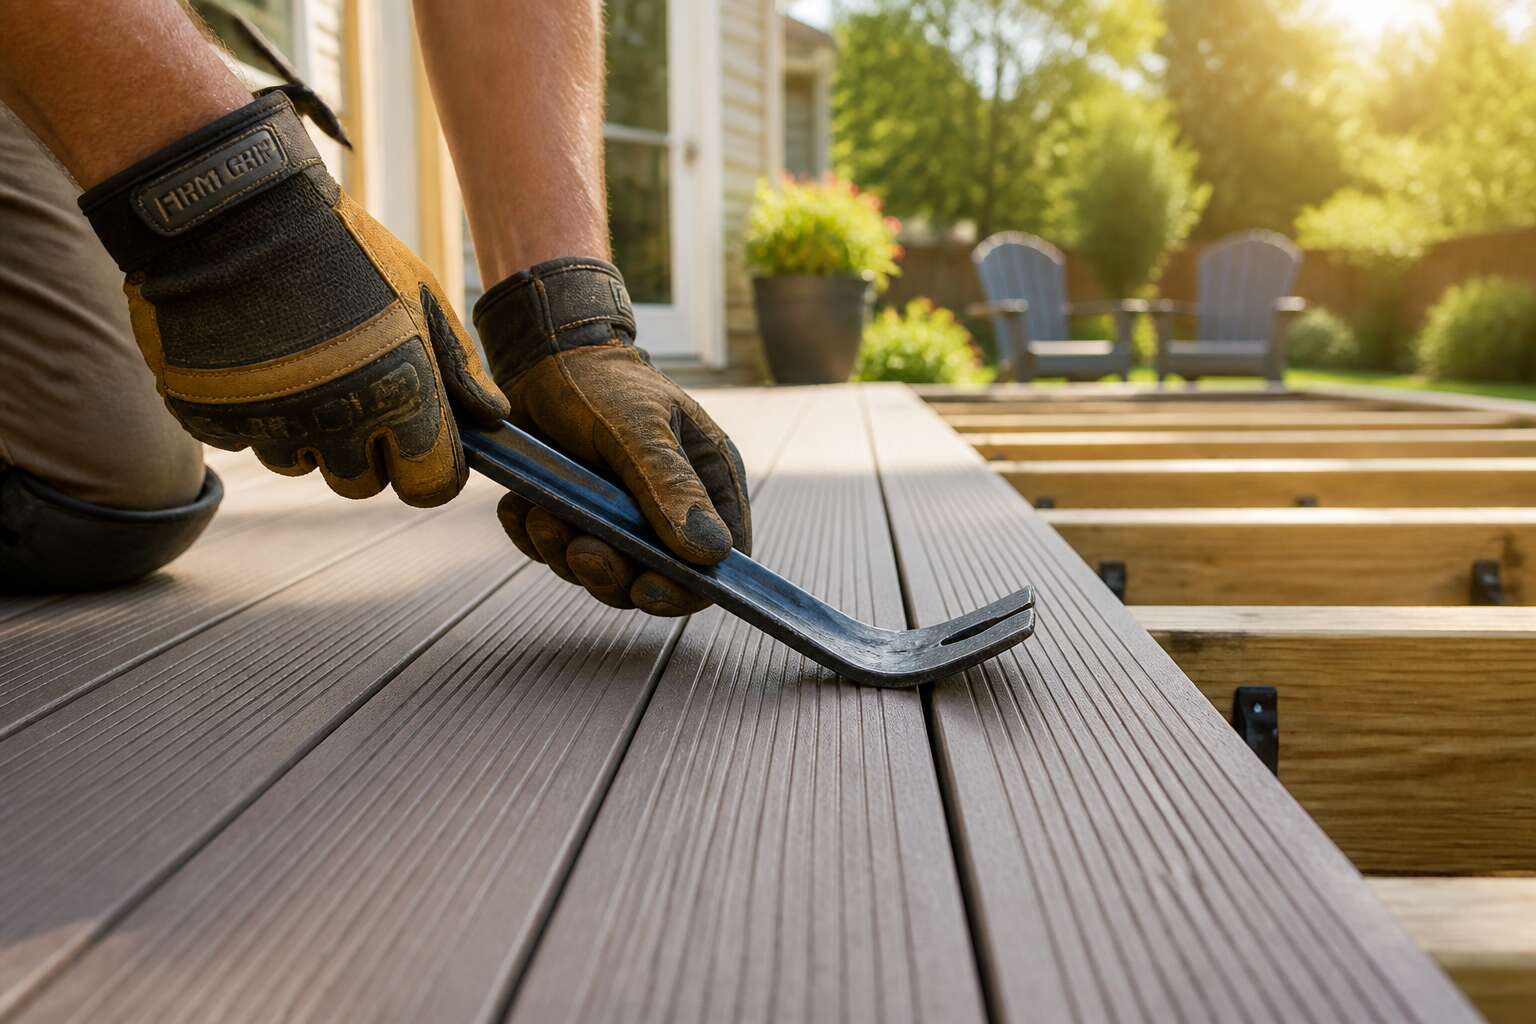
Deck Framing and Surface Preparation
Inspecting the Joist Layout
Before you send that first screw into a deck board, the joists underneath deserve a forensic examination. A misaligned joist layout is the stealthy culprit behind many a dodgy deck. I’ve seen joists with a crowning arc so proud they’d make Table Mountain jealous, and it never ends well.
Verify the top plane is flat. Use a long straight edge and a spirit level to check for dips and humps. If one joist sits 3mm higher than its neighbour, you’ve just created a trip hazard for your braai guests. The spacing between joists also dictates board flex. Standard practice says 400mm on centre, but your local conditions might demand less.
Here is the quick checklist I run through:
- Check every joist for twist and cup.
- Confirm the fixings are rated for outdoor use.
- Ensure the joist ends breathe on the rim board.
Skimp on this inspection, and you’ll be redoing the deck faster than you can say ‘load shedding’. Clean off any sawdust and allow the timber to dry before you even think about a screw.
Establishing a Reference Line
Before the first board meets the frame, square the frame against a fixed reference. I have watched builders level joists obsessively, only to let the leading edge drift. Snap a chalk line along the outer rim, measuring from the house wall, never from a warped joist. The house is the only unyielding truth here.
Surface preparation is equally demanding. Sawdust traps moisture. When racking deck boards over damp framing, the decay begins before the first screw. Sweep, then wait for the morning dew to burn off. Allow the frame to dry, then set your datum.
That first line dictates the fate of every subsequent board. A 3mm deviation at the start becomes a 30mm drift at the far end. Racking deck boards across long spans demands this discipline. The line is the contract, and the deck honours it.
Gathering Tools and Materials
In South Africa, the weather is a notorious negotiator. It will offer a perfect, dry morning, then bill you for it with an afternoon thunderstorm. So, gathering tools and materials for this job is an act of preemptive surrender. You are not simply collecting objects; you are assembling a defence against moisture, warping, and your own impatience.
Begin with the essentials, and question anyone who tells you otherwise.
– A reliable tape measure, preferably one that has not been dropped from a scaffold.
– A chalk line, because your eye is a liar.
– Galvanised screws, the only true marriage between timber and time.
– A circular saw with a sharp blade, for the inevitable cuts that refuse to be straight.
– A pry bar, for the moment you must correct a mistake with grace.
Then, sort your lumber. Do not trust the pile. Each board has a story of grain, twist, and cup. Racking deck boards requires selecting for the straightest face, not the prettiest one. A bowed plank will mock your neat lines. Surface preparation means feeling the grain with your fingers and rejecting anything that fights back.
The framing beneath is the quiet partner in this dance. Before a single screw is driven, sweep the joists clean. Dust and debris are the uninvited guests at this gathering. A clean frame is a courteous frame. When you finally begin racking deck boards, you will appreciate the absence of grit and the security of a solid foundation. The fasteners do the holding, but patience does the real work.
Methods for Consistent Board Spacing
Using Nails or Screws as Spacers
The width of a nail shank is the oldest measuring tool on site. When racking deck boards, set the shank against the fastened board. Slide the next board until it rests against the shank. Fix the board, then withdraw the spacer. Repeat this motion down the deck and the gaps stay identical.
1. Place the shank against the installed board’s edge.
2. Bring the new board to touch the shank.
3. Secure the board and pull the spacer free.
Screw shanks fit this role as well, though you want screws with a smooth upper segment. Fully threaded screws bite into the wood and yield uneven spacing.
Different gauges give different gaps. A 3mm shank creates a tight seam; a 4mm shank gives a wider opening for heavy rainfall zones. Keep a few sizes in your pocket while racking deck boards.
Inspect each board before you set the spacer. A bowed edge will corrupt the gap and travel down the row.
Leveraging Store-Bought Spacing Tools
The gap between deck boards is where moisture finds its exit, and where arguments begin. Store bought spacers remove much of the quarrel. Plastic hourglass gadgets click into place and promise mechanistic perfection. They deliver, mostly.
Snap a spacer onto the joist, and the gap is fixed before you measure it. No shank guessing. A spinner spacer rotates gently as you rack deck boards, widening the seam without requiring you to bend. Wedges handle tapered ground and small undulations.
– Place the first board against your reference line.
– Drop the spacer on the joist.
– Position the next board and lock it.
Each store bought tool leaves its signature width. Know your climate, then choose the gap that matches. The device flatters your back and your eye.
Managing Sloped vs. Straight Deck Surfaces
The slope is where reckoning begins. A straight run hides mistakes; a slope exposes every one of them. Racking deck boards on an incline requires you to abandon the illusion of a uniform plane. You must measure the vertical drop at each joist, then calculate the true gap for every board. Gravity pulls the layout, so your eye must compensate for what the level cannot tell you. The sequence becomes a study in adaptation, not repetition.
– Measure the pitch at three distinct points along the slope.
– Calculate the average deviation from your reference line.
– Set the spacer depth based on that average, not the highest point.
A straight deck surface offers its own deception. It tempts you into complacency, where precision feels automatic. The dimensional variance in the lumber itself becomes the hidden variable. You tighten each joint without checking the cumulative effect, and by the tenth board, the gap has narrowed. Consistency demands you measure every fifth run, even when the surface appears true. The eye lies; the tape measure rarely does.
Adjusting for Weather and Wood Movement
Forget the flashy spacer tricks. The real adversary in racking deck boards is moisture. Timber breathes, and it does so without asking your permission. A board installed bone dry in July will shrink by winter, leaving gaps wide enough to swallow a ten-cent coin. Install it wet, and it will cup or crown as it dries. You are not fixing boards in place; you are negotiating with a living material that will move with every season.
Set the gap for the board’s average condition, not the day you install it. Measure the moisture content of your stock at three points along its length before you lay a single row. Boards with a higher reading will shrink more; those already dry will move less. Take readings mid-morning, when the temperature has stabilised and the dew has burned off.
- Check the moisture meter against a known dry sample first.
- Record the average percentage for each plank.
- Sort boards with similar readings into the same run.
- Adjust the spacer for the plank’s future state, not its current one.
The sun will dry the top face faster than the underside, causing boards to cup toward the heat. The fasteners hold the edges, but they cannot stop the grain from swelling. A consistent spacing method accounts for this differential. It leaves room for the board to expand across its width without buckling against its neighbour. Get this right, and the surface stays true through the Highveld thunderstorms and the Karoo droughts. Get it wrong, and your precision becomes a liability. The board has nowhere to go, so it twists. Consistent spacing for racking deck boards is a prediction, a calculation of what the timber will become.
Creating a Custom Spacing Jig
Most spacing mistakes happen because your eye and your fingers disagree. A custom spacing jig settles that argument. I make one from a straight offcut of treated pine and a few stainless steel screws. Measure the intended gap, then fix two small blocks to the offcut at that distance. The leading block rides against the laid board, while the trailing block stops the next board exactly where it belongs.
Here is my method:
- Cut the offcut to shoulder height.
- Mark the gap distance twice along its length.
- Screw the blocks so their inner faces match those marks.
The jig slides along the joist, seating each board as you progress. This keeps racking deck boards consistent across the whole surface, and the jig adapts to different board widths by resetting the blocks. It works with any decking profile.
Fastening and Securing the Boards
Pre-Drilling to Prevent Splitting
The art of racking deck boards extends beyond mere alignment; the true test of craftsmanship emerges when you secure each plank to the substructure. Fastening is where many projects quietly fail, revealing split timber and loose fixtures long before the first summer storm arrives. A century of carpentry has shown that precision here dictates the structural integrity of your entire outdoor space, which is why the careful selection of fasteners matters as much as the layout itself.
Pre-drilling is not an optional flourish but a fundamental discipline for the dedicated builder. When you drive a screw or nail into dense hardwood like Balau or treated pine, the displaced wood fibres exert immense sideways pressure. Without a pilot hole, this pressure forces the material to fracture along the grain, compromising the board’s core strength. This practice becomes non-negotiable when working near the ends of the planks, where the fibres are most vulnerable. The process demands patience, but the result is a pristine surface free from ugly cracks.
A workmanlike approach to this task often involves a few key checks before you commit to the permanent fix:
– Confirm your drill bit diameter matches the fastener’s shaft, not its threads.
– Position pilot holes consistently, roughly 20 to 30 millimetres from the board edges.
– Use a countersink bit to create a seamless recess for the screw head, flush with the timber face.
These details ensure each fixture pulls the board down firmly without wrestling against the wood’s internal resistance. Furthermore, remember that a snug fit is superior to a forceful one. If a screw resists during the final quarter turn, you have likely hit a dense knot. Backing it out and repositioning slightly is wiser than forcing the issue and shearing the screw head. This level of care prevents swollen, split boards that eventually loosen and require jarring replacement. By mastering this stage, your newly racked layout remains whisper quiet and steadfast underfoot for decades, a silent testament to meticulous effort.
Choosing the Right Screws or Nails
Few choices affect racking deck boards more than the fastener itself. A common error is grabbing whatever screws are left in the toolbox. That choice costs you later. For South African hardwoods like Balau, use stainless steel or coated screws rated for outdoor exposure. Nails work but they loosen over time with seasonal movement. Screws provide superior pull-out strength.
Consider these practical points:
- Use coarse threads for softwoods, fine threads for hardwoods.
- Pick a screw length that penetrates the joist by at least 30 millimetres.
- Avoid galvanised nails in treated pine; the chemical reaction causes premature corrosion.
The right fastener disappears into the board, holding each plank without stress. When you are racking deck boards with matched screws, the substructure works as one unit. That quiet solidity underfoot is your real reward.
Positioning Fasteners on the Board
The position of a fastener dictates how a deck will behave underfoot. When racking deck boards, set each screw roughly 16 to 20 millimetres from the board edge. Closer placement risks splitting dense South African hardwoods, while wider spacing allows the edge to curl with seasonal moisture.
Fix each screw into the centre of the joist below. I have seen decks fail because a fastener bit into the joist edge, creating a weak anchor that loosens within a year. Keep the screw line straight and true.
- Countersink each head just below the surface.
- Angle the screw slightly with the grain.
- Keep spacing uniform across every board.
That discipline holds each plank without stress, so the whole substructure moves as one.
Dealing with Crooked or Warped Boards
Every deck builder knows the aggravating truth: timber rarely arrives straight. Heat, humidity, and poor storage conspire to twist boards into shapes that defy intention. When racking deck boards, you will face boards with a pronounced crown, a cup, or a stubborn bow. This is not a flaw to lament. It is a challenge to overcome.
For a board that rocks like a seesaw, apply pressure at the centre. I use a long lever or a pry bar with a padded fulcrum to coax the stubborn plank down to the joist line. Force it flush, then drive your fastener home immediately. The screw holds the tension. Do not release the pressure until the screw is seated.
Check for a twist by sighting down the length of the board. A twist is the worst offender, pulling one corner skyward. You must fix that low corner first, using a temporary clamp if needed, before securing the opposite corner. The goal is to draw the entire board into the same plane as its neighbours.
– Work from the most bowed end towards the straight end.
– Fix the centre first to split the curve in half.
– Use a helper to apply even pressure across long boards.
Dealing with a warped board is a negotiation. You demand compliance, and the timber resists. But with steady pressure and precise fastening, you will win the argument. The finished surface honours the effort. Racking deck boards is less about speed and more about this exact, quiet struggle against the material. The reward is a deck that lies flat and stays true for decades.
Handling Cuts, Ends, and Obstacles
Measuring and Cutting for Corners
When you rack deck boards around corners or protruding obstacles, measure each gap individually because no two cuts are identical. A scribing compass offers exact transfer for irregular edges, while a bevel gauge handles angled joints. For common protrusions, I recommend these steps:
- Mark the board width at the obstacle location
- Transfer the depth using a contour gauge
- Dry fit before making any permanent cut
Corners demand particular patience. Cut slightly long, then shave down with a block plane for a snug, seamless fit. Always seal exposed end grain with a quality wood preservative to prevent moisture intrusion. Racking deck boards with clean, precise corners transforms a decent installation into a professional one.
Working Around Posts and Pipes
Posts and pipes introduce a different problem. A corner demands an angled cut, but a post wants a notch. A pipe requires a hole. Each has its own strategy, and the order of operations matters.
Mark the post’s position with a combination square, then transfer the width to the board. Cut with a jigsaw, staying just inside the pencil line. Clean up the edges with a chisel for a snug fit. Racking deck boards around posts tests your patience more than your skill.
- Measure the post width at deck level, not ground level
- Drill a relief hole at the notch’s corner to ease the jigsaw turn
- Dry fit the board and adjust the notch edges with a file
In my experience, pipes often have collars or flanges. Use a hole saw slightly larger than the pipe, then cut the board at the hole’s centre. Slip the board around the pipe instead of lifting it over. This method of racking deck boards around pipes keeps the surface clean and avoids unsightly gaps.
Staggering End Joints for Stability
No two end joints should ever share a line. The fastest route to a sagging deck is aligning every cut board’s termination point. Staggering end joints forces each joint to carry its own load, preventing stress from pooling along a single row. I always shift each subsequent board’s joint by at least two joist spans. This simple offset transforms a fragile grid into a resilient surface that absorbs movement without cracking.
When I plan the layout, I treat each board’s end as an independent obstacle. The position of the previous cut dictates where the next one lands. A random stagger works best, not a repeating pattern. Here is the sequence I use:
- Measure the first full board and mark its end joint.
- Cut the next board two joists past that mark.
- Reserve any offcuts for small gaps or future repairs.
This approach to racking deck boards lowers waste and keeps the surface steady under foot traffic.
Using a Circular Saw vs. Miter Saw
You could spend a small fortune on pre-cut boards, but where is the fun in that? The real artistry of racking deck boards unfolds when you must slice, dice, and wrestle lumber into place around your deck’s personality. I have found the circular saw to be the undisputed workhorse for this task. It is portable, aggressive, and ready to chew through a stubborn 2×6 while balancing on a joist. The key is to manage the splintering on the underside of the cut. I always score the line with a utility knife first. This simple act prevents the veneer from tearing out and leaving a ragged edge that screams “amateur hour” from the street.
For the final cuts on board ends, especially where they meet a fascia or a post, the miter saw takes over. It offers a level of precision that a handheld saw simply cannot match. When you are measuring for an obstacle, you want a blade that drops straight down and gives you a clean, true 90-degree angle. My process breaks down like this:
1. Mark the board from the underside to avoid tear-out.
2. Use the circular saw for long, rip cuts along the length.
3. Switch to the miter saw for crisp crosscuts at the ends.
The result is a deck that looks intentional, even when you are navigating around a rogue pipe that the architect placed just to annoy you.
Leaving Expansion Gaps at Edges
Handling cuts, ends, and obstacles requires a deliberate approach when racking deck boards. I always leave a slight extra length on ends that tuck under a fascia, then trim once the board is seated. This prevents the splintering that comes from forcing a tight fit. On the sides facing the house or a wall, the expansion gap at the edges is non-negotiable. This climate swings hard between wet and dry seasons, and wood will push against any immovable frame.
For pipe penetrations or post bases, I trace the obstacle with a scriber, cut 3 mm outside the line, and keep that gap open. The edge gap prevents future buckling.
- Dry fit the board with temporary spacers.
- Mark the obstacle profile from underneath.
- Cut with a jigsaw, staying clear of the line.
- Remove spacers to open the expansion gap.
Racking deck boards this way ensures each board moves independently with humidity changes.
Securing Starter and Ending Boards
When racking deck boards, the starter board sets the tone for the entire run. I clamp it firmly and check for twist. A crook here compounds across each subsequent row. For the ending board, I measure from the last fixed board, not the framing, because joists wander. Obstacles at the perimeter demand a different tactic. I scribe the profile and cut with a sharp blade.
- Cut the ending board long, then plane the edge.
- Predrill through the face at an angle.
- Drive the screw slowly to avoid pull.
Securing these boards correctly prevents the rest from shifting. In Cape Town’s humidity, a locked starter board can cause cupping.
Finishing Touches and Long-Term Care
Sanding and Smoothing Edges
Once every screw is seated, the deck’s edges reveal the quality of your work. Sanding and smoothing edges is the final step before any finish is applied. Racking deck boards leaves saw marks, splinters, and proud corners that will catch bare feet. A random orbit sander with 80 grit paper handles the bulk; follow with 120 grit to soften the grain.
Pay special attention to end cuts near door thresholds and pool copings. These areas receive constant traffic.
- A block plane removes protruding edges before sanding starts.
- Dust in the grooves traps moisture if left unattended.
Long-term care begins with the finish you choose. A UV resistant oil penetrates the fresh cuts, while a film forming sealer shields the surface. Racking deck boards with precision today reduces the need for extensive repairs in the coming years.
Applying Sealant or Stain
A deck in Durban can show wear within a single rainy season. The finish is the only barrier between your work and the elements. The moment your racking deck boards are clean and dry, they are vulnerable.
Here is the sequence that works:
- Check the weather forecast for 48 hours of clear skies.
- Apply a wood brightener to neutralise any mill glaze.
- Stir the sealant thoroughly; do not shake it!
- Use a roller for the field and a brush for the end grain.
Sealant soaks into the exposed cells of each board, while stain adds pigment for UV defence. For coastal regions, a higher solids content resists salt air. Reapply every two years, or sooner if water stops beading on the surface. Consistent coverage prevents moisture from penetrating the wood.
Inspecting for Loose Boards
Once the sealant has cured, the deck enters a long term relationship with the elements. A loose board can appear after the first spring storm, creating tripping hazards. Inspecting for loose boards demands patience, not panic. Walk the full surface to feel subtle shifts.
Probe every fastener with a flat screwdriver. Look for rust, movement, or lifted wood. The racking deck boards in high traffic zones announce themselves with a squeak. Check the perimeter, then work inward. Coastal air accelerates corrosion on screws, consider stainless steel replacements.
- Listen for hollow sounds underfoot
- Push each board vertically to test resistance
- Examine the seams for water damage
When a board feels loose, do not ignore it. A single fastener often restores stability; tighten the screw without overdriving. The goal is to keep the racking deck boards aligned without splitting the timber. Regular checks after heavy weather extend the life of your deck.
Seasonal Adjustments and Maintenance
A deck is a living installation. The elements demand attentiveness from anyone who listens. Seasonal shifts in South Africa are particularly pronounced, especially for outdoor timber in regions like the Cape or the Highveld. The sun is relentless. The rain arrives with urgency. Each cycle test the integrity of your work. You must adjust your approach to racking deck boards as the calendar turns. A rigid schedule only works if your climate follows one. Most do not.
Autumn is the quiet season for many homeowners, but it is the perfect time for preventative care. Leaves and debris trap moisture against the grain if left to settle. Remove them promptly. Check the spaces between boards. The gaps you worked so hard to establish during installation require periodic clearing for airflow to do its job. Once winter sets in, the cold ground contracts. The timbers respond in kind. Fasteners can loosen around the frost line. This is a normal phenomenon. Knowing this allows you to plan your maintenance instead of reacting to an emergency.
Spring brings a different kind of pressure. The thaw and the first heavy rains test the structural bonds. Walk your property with intention. Observe how the surface handles water pooling. Mild pressures on the leading edges of the planks reveal subtle movements. The goal is to identify the small shifts to prevent the large failures later in the summer. Summer heat can dry boards to a crisp. Thermal expansion becomes your main concern. A board that was flush in the morning might bow by midday. Do not fight this natural progression. Allow your seasonal care to accommodate these physical changes rather than trying to oppose them.
– Monitor the sealant integrity at the end of summer
– Tighten any hardware that has worked itself loose after the dry spell
– Reapply a weatherproofing agent to exposed end grains before the wet season returns
The overarching principle for long-term care is consistency. The deck is a system of variables. Your relationship to it changes with each passing month. The coastal salt air, the inland dust, the highveld hail, all of them leave their fingerprints. Maintenance is not a single event but a cycle of observation and small corrections. The rhythm of the seasons provides the tempo. Your racking deck boards remain a project of renewal, a statement that good work deserves good stewardship. Treat the annual checkup as a conversation with your deck. Listen to the creaks and the hollow sounds. They are the only warnings you will get before a minor fix becomes a major project. This yearly ritual ensures the quality of the build endures for a decade or more. Fine racking deck boards are not a fixture you install once and forget. They are a commitment you renew with every change in the weather.




0 Comments